Zoom
Zoom is a web conferencing tool.
*Avoid Security Issues*
At other universities, some public Zoom meetings have been hijacked by unintended participants who displayed inappropriate content to the class. In order to avoid this issue, we recommend adopting one or more of the following security enhancements.
Only allow MIT authenticated users to participate Updated 3-27-2020
- Login to mit.zoom.us
- Go to Meetings
- Click on the title of your recurring meeting.
- Select “Edit this meeting” And choose “All”
- Check the “Only allow authenticated users” button in Meeting Options and SAVE!
- Note this is an additional hassle for students, but essentially makes meeting private to the MIT community.
- You must let students know that they must be logged into mit.zoom.us first before joining the meeting if you choose this option!!!
Share (public) zoom links on private websites
- Stellar (with visibility settings set to either MIT or registered students)
- Piazza with a password shared with registered students over email
Only allow host to share screen (not for collaborative learning) Updated 3-26-2020
- Login to mit.zoom.us
- Go to Settings
- Under the heading In Meeting (Basic) > Screen Sharing > Who can share? Select Host Only.
- (Note this can be adjusted during a meeting.)
Add a waiting room (for small groups only)
- Login to mit.zoom.us
- Go to Meetings
- Click on the title of your recurring meeting.
- Select “Edit this meeting” And choose “All”
- Check the “Enable waiting room” button in Meeting Options and SAVE!
- Let students into the meeting from the Manage Participants window.
- Note that you will have to choose to let in every meeting participant by hand, so this only works well for small groups.
- If students are late, you may not notice immediately! Try to be vigilant about watching your waiting room.
Disable or limit file transfer - prevents files with viruses being shared Updated 3-26-2020
- Login to mit.zoom.us
- Go to Settings
- Under the heading In Meeting (Basic)
- Disable File Transfer entirely, or
- Allow File Transfer of certain file types only! (.png, .jpeg, .pdf, .tex)
Add a password
- Login to mit.zoom.us
- To add a passcode to all future meetings
- Go to Settings
- under the heading 'Security', turn on Require a password when scheduling new meetings
- To add a passcode to a single meeting, check the "passcode" box in the "Security" section when setting up your meeting
- This will generate a random password that can be shared with intended participants through email (not on your public website!)
*Please note that the password is automatically added to the Zoom link. If you want to require the use to enter the password, you can either share the meeting ID only, or removed the "pwd=" and following character from the link URL.
Using Zoom
Basic performance Updated 1-12-2021
General Zoom Help Center Link | List of Zoom video tutorials
In order to have the full capability of zoom described here, sign into mit.zoom.us using your kerberos ID before joining a meeting.
- Join a meeting (video and text)
- Schedule a meeting (video and text)
- If using Canvas, schedule your Zoom meetings directly through Canvas. (Otherwise, schedule through mit.zoom.us)
- Recommended to use a recurring meeting so the link is the same for all class times for the remainder of the semester.
- Set meeting settings to:
- Automatically record meeting
- Automatically mute participants upon entry
- Add an alt-host in case of emergency, someone else can host
- Only allow authenticated users to join
- You may not want to give out your personal meeting room for this purpose.
- Meeting controls (video and text)
- Gallery View - Allows you to see up to 49 meeting participants on one screen
- Turn on/off audio
- Turn on/off video
- Participant list (mute all, unmute all, change host, raising hands, nonverbal communication)
- Share screen (desktop, application, ipad, whiteboard)
- Chat (make sure to save as chat content is lost after meeting ends)
- Record
- Recording a Zoom meeting (video and text)
- Managing cloud recordings (text) (We recommend recording to your computer. However if you are recording from an iPad, this is not possible. Instead, save to the Zoom cloud. You can then download and upload to OVS from a computer once it has finished processing.)
- Joining and configuring audio & video (video and text)
- Testing Video (text)
- Sharing a screen (video and text)
Advanced performance Updated 3-15-2021
- Providing and managing nonverbal feedback (text)
- It can be difficult to manage nonverbal feedback while sharing your screen. You may want to:
- Exit screen share and move into Gallery mode when using
- Have second screen available to monitor nonverbal feedback, or
- ask a TA or UA to assist to monitor
- It can be difficult to manage nonverbal feedback while sharing your screen. You may want to:
- Consider using a 3rd party chats like Slack or Piazza, this will save the chats automatically for students who cannot join synchronously.
- Sharing multiple screens simultaneously (video and text)
- Breakout Rooms for collaboration
- Create rooms automatically or manually
- When using automatically created rooms, it can be difficult to add students who come late to a room. Consider not having a breakout too soon after a lecture has started to allow for latecomers.
- How to move between rooms: Hosts and co-hosts can move between rooms. Only the host can message the entire room. (Can make everyone a co-host if you want! Assign different problems to different breakout rooms and let people choose which problem they want to work on.)
- Bringing everyone back to the main room takes 1 minute. So send the notification a minute before you expect people back.
- Whiteboards can be shared that allow collaborative annotations
- If enabled, students can annotate shared screens or whiteboards
- Note that whiteboard content is saved from a breakout room and can be shared with the main room, or is saved and an be used again in the next breakout session.
- Polling tools
- Best when set up ahead of time
- Can be multiple choice or choose all that apply
- Can create multiple polls, and can run multiple times.
- Can share results or not
- Can allow polls to be anonymous or not
- 2 Sample Polls templates to have on hand:
- Which is correct?
- A
- B
- C
- D
- None of the above
- How clear was that explanation?
- Crystal clear
- A little murky
- Clear as mud
- Oops, I got distracted
- Which is correct?
- Best when set up ahead of time
Setting Up on Computer
Download Zoom
- Go to https://zoom.us/download
- Click “Download” under “Zoom Client for Meetings”
- Follow the steps to set up Zoom
Set up Zoom
- Open Zoom: https://mit.zoom.us
- Click “Sign In”
- Click “SSO” under “OR, SIGN IN WITH”
- Enter “MIT” as the company domain
- A browser window should pop up. Enter your username and password for MIT
- You should be prompted with the tab “Open this page in ‘Zoom’?”. Click “Open”
- You may be prompted by Zoom to access your calendar or location. Click “Allow” or “Don’t Allow” at your comfort
- You should be able to use Zoom now
Setting Up on iPad
Download “Zoom” on “App Store”
- Go to “App Store”
- Click “Search” on the lower right corner
- Type in “Zoom”
- Click “ZOOM Cloud Meetings”
- Click “Get”
Set up Zoom
- Open Zoom https://mit.zoom.us
- Click “Sign In”
- Click “SSO” under “OR, SIGN IN WITH”
- Enter “MIT” as the company domain
- A browser window should pop up. Verify your MIT account in the usual way
- You should be prompted with the tab “Open this page in ‘Zoom’?”. Click “Open”
- You may be prompted by Zoom to access your calendar or location. Click “Allow” or “Don’t Allow” at your comfort
- You should be able to use Zoom now
Sharing a tablet screen in Zoom Updated 3-15-2021
Option 1: Connecting iPad with a cord to a Mac machine
Zoom resource - Scroll to "How to Share with a Wired Connection"
(If you have issues with this set-up, try using Option 2 below.)
- Use a cord to connect the iPad directly to your computer
- Click “Share” in the Zoom window
- Select “iPhone/iPad via Cable” option, and then click “Share”
- A window will appear on your iPad that says “Trust This Computer?”
- Select “Trust”
- Enter your passcode if required
Option 2: Connecting iPad (or Android) as another user
In this scenario, you will be in the Zoom meeting on a computer and also joining using the iPad. You will also be joining the meeting on an iPad. This means you will be joining as two “users.” Your computer and your iPad will appear as meeting participants in the participants list.
- Make sure your iPad is running the latest OS version
- Download the Zoom app on your iPad
- Log in using your Kerberos MIT credentials
- For a first-time setup, there are some settings you need to configure on your iPad. Follow the instructions found here: Zoom resource
- Make sure you are in the Zoom meeting on your computer as well
- Turn the volume on your iPad off
- Open the Zoom app and enter the meeting ID to join
- When you join from the iPad, make sure you join without audio. Having the iPad audio on will cause feedback with your computer audio. Select “Don’t Connect Audio” and “Don’t Allow Access To Microphone”
- New bug! Even if you do not connect audio, and mute your iPad, you will also need to go into the settings (three dots) and select disconnect audio so that no sound comes out, even with iPad muted.
- From the iPad, select “Share Content”
- Select “Screen”. Then the option to record should pop us. It is recommended to record on Zoom.
- Click “Zoom”
- Click “Start Broadcasting”
Bug report: cannot launch polls from iPad:
- The zoom application on the ipad (or android tablet) doesn't allow launching a poll (only viewing the results)
- When you connect several devices to a zoom session, and you are the host, you can only poll from the LAST device you connected (as it logs you off from the other devices).
Solution: To be able to launch a poll from your laptop or computer, what you need is to FIRST connect the ipad, and THEN the laptop.
Option 3: Connecting peripheral tablet (e.g. Wacom tablet)
A peripheral tablet works in the same way as your computer mouse or trackpad.
- Before accessing Zoom, make sure you are able to plug in and use your tablet as a mouse on your computer. Download any drivers that you may need depending on which type of tablet you have. Setting up Wacom tablet resource
- Log in to Zoom on your computer
- Open whichever app you plan to use to write
- Connect your tablet (if you have not already done so)
- Select “Share” and choose either your desktop (if you would like to share your screen as is) or whichever app you will be using to write with.
Scheduling a Recurring Zoom Meeting Updated 3-27-2020
Schedule a meeting (video and text)
Step-by-step Instructions Updated 3-27-2020
- Sign in on mit.zoom.us
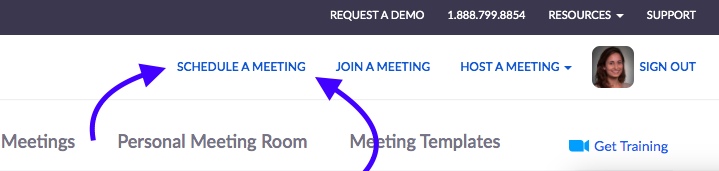
- On the upper part of screen select “Schedule Meeting”
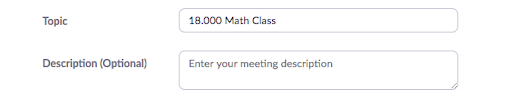
- In topic enter the course number and title, is it Lecture? Recitation? Office Hours? Give a description if there will be more than one office hour or recitation.
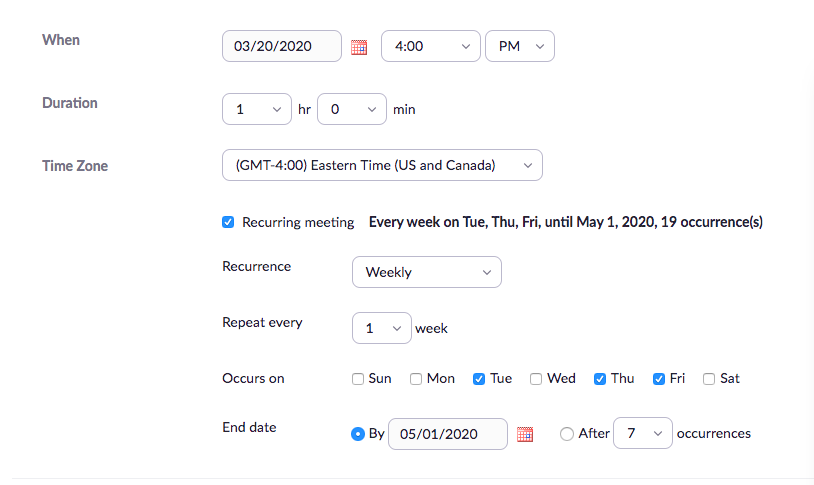
- Set up the dates of the meeting:
- Select the Date of the first class after spring break.
- Select the duration. (Note if you go over the amount of time, it is not a problem.)
- Click checkbox for “Recurring Meeting”
- Select “Weekly” under Recurrence
- Select the days of the week your meetings are held: (in this example we have Tuesday, Thursday, and Friday)
- Pro tip: Can select recurring, no time for meetings with the same link to happen whenever you want, not on a particular schedule.
- Select the meetings to end on May 12, the last day of classes.
- Scroll down to Meeting Options. (Recommended) select:
- Enable join before host
- Mute participants upon entry
- Record meeting automatically
- Record to zoom cloud (recommended), or
- Record to your local computer. This will save movie files inside your Documents > Zoom > Meeting Folder (with date). Will need to upload to Dropbox and share from Dropbox or OVS
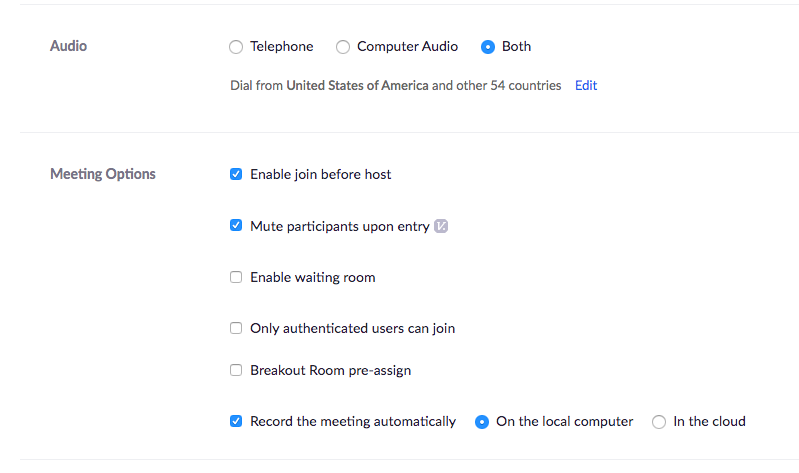
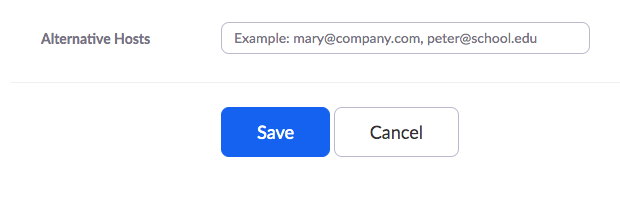
- Below Meeting Options, Add an Alternate Host. This can be a TA, or anyone else who may need to Host for you in case of emergency/illness etc.
- Click SAVE at the bottom of the page!
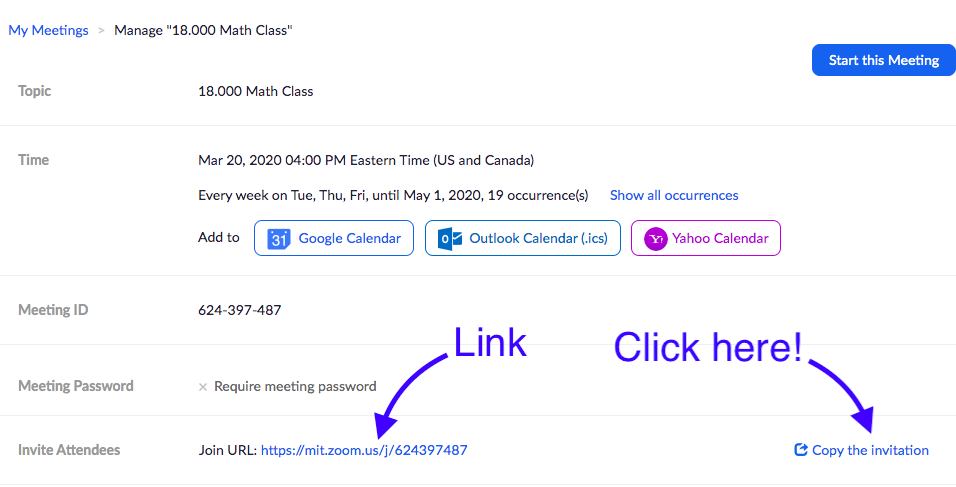
- This takes you to a screen with the Zoom link and an invitation. Click Copy Invitation to get a copy of the dates of the meetings, and various ways to access the meeting. (Links, phone numbers, phone numbers for international numbers and more.) Email this invitation to your students, and save the link to the recurring meetings on your Stellar webpage!