Thunderbird
Thunderbird is a popular graphical email client and is supported on Linux, Windows, and Mac. The following steps will show you how to set it up to use with your math email account.
- Start Thunderbird. If you are using Linux, you will find Thunderbird under Internet in the Applications menu. If you are using a Mac, you will find Thunderbird in the Applications directory. If you are using Windows, you will find Thunderbird as either an icon on your desktop or in the All Programs list of the Start menu.
- If this is the first account you will be configuring in Thunderbird, the
account setup wizard will launch automaticaly. To manualy launch the account
setup wizard:
- If you are using a Mac or Windows, go to Account Settings under the Tools Menu. Under Account Actions select Add new account.
- If you are using Linux, go to Account Settings under the Edit Menu. Under Account Actions select Add new account.
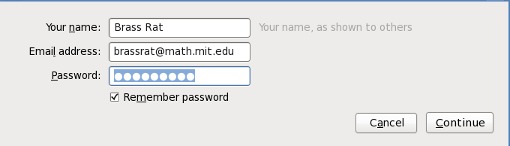
- Enter your full name, Math Department email address, and password (as
pictured below). Click Continue.
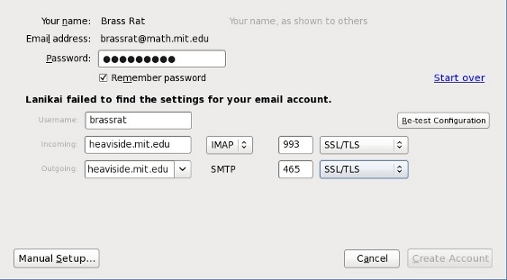
- At first, Thunderbird will attempt to detect your email server settings.
If Thunderbird fails to find the settings for your email account, you will have
to enter these details manualy. For Incoming enter 'heaviside.mit.edu',
select 'IMAP', enter '993' for the port, and select 'SSL/TLS'. For Outgoing
enter 'heaviside.mit.edu', enter '465' for the port, and select 'SSL/TLS' (as
pictured below). Click Re-test configuration.
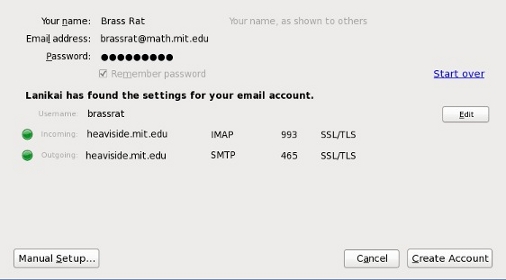
- If the settings were entered correctly, green lights should appear next to
Incoming and Outgoing. Click Create Account. If you
do not see the green lights (as pictured below), click Edit and confirm
the settings from the previous step were correctly entered.
- Thunderbird will now connect to the Math department mail server and access your inbox, but in order to see and edit new mail folders we must complete one more step. Go to back to the Account Settings window (see second step). Under your @math.mit.edu account click on Server Settings in the left panel.
- On the Server Settings panel click on Advanced.
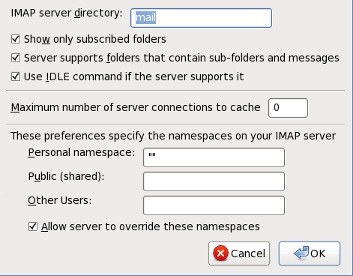
- In the Advanced Settings window, enter 'mail' into the IMAP server
directory box (as pictured below). Click OK to close the Advanced
Account Settings window, then OK again to close the Account
Settings window.
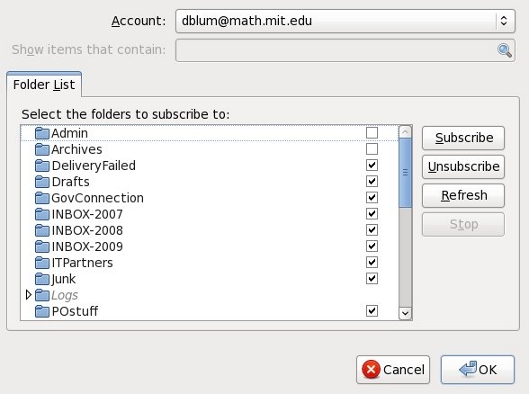
- Email folders you have previously created should now appear on the Folders
pane of Thunderbird. If your email folders do not appear, right click on your
Inbox in the Left pane of Thunderbird and select Subscribe. In the
Subscriptions window (pictured below), check of any additional mail
folders you would like to appear in Thunderbird and click OK. If you
have a lot of mail, it may take a while for all of the folders to appear.